
Lutong Bahay: Oriental Journey Master Class with Kikkoman
Have you been a reader here at The Purple Doll for a while now? 'Cause if you do, chances are, you'd probably already know of my deep love for Japanese cuisine. From dining at traditional Japanese restaurants, to going on modern Japanese and fusion gastronomic adventures -- I can definitely say that even if I already had a lot, I'm still very hungry for more Japanese noms.
But of course, there are times when eating out is not always plausible. And for that, I can proudly say that I've even tried my hand at recreating my favorite Japanese dishes, like making my own sushi rolls, katsu, Japanese curry, cold soba, tempura udon, and more.
Just recently, Kikkoman has extended me an invitation to be part of their Oriental Journey: Master Class -- an exclusive cooking class held at 25 Mushrooms Kitchen in Pasig City, sponsored by none other than Kikkoman, which highlighted and took us on a journey to discover the wonders of authentic, restaurant-style oriental dishes. And as a Japanese food lover and amateur-but-passionate home-cook, of course I accepted!
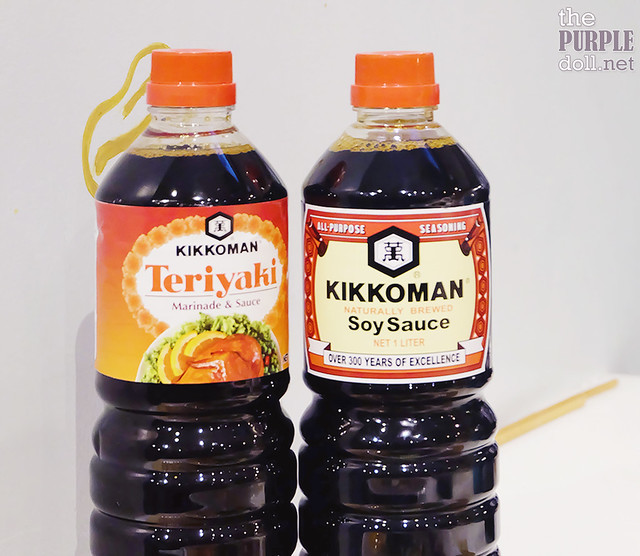
Truth be told, I'm not only interested in learning more about cooking Japanese dishes, but I actually am an enthusiastic fan of the brand. Kikkoman has always been my family's choice of soy sauce, and not only for dipping, as we've cooked countless dishes -- both Japanese and non-Japanese fare, using this very brand's products.
One thing I love about Kikkoman is how its products are naturally-brewed, and with over 300 years of tradition at that. This doesn't only make their line of soy sauces generally healthier, but also makes them more superior in taste, color and aroma. And unlike chemically-processed soy sauces which only add saltiness and color, and more-often-than-not drown out other ingredients' flavors, Kikkoman's enhances food's natural flavors and brings out notes that wouldn't have been there otherwise.

All the attendees in the Oriental Journey: Master Class, including myself, were taught these recipes which we then had to recreate. Some of these dishes, I already got to cook at home for my family (and using Kikkoman products too). But I was glad to learn more cooking hacks from the chefs and instructors at 25 Mushrooms Kitchen. And I'm sure they'll be of help to you too! (*’-^*)b
I've always loved sushi, and I've actually made a few for a while now. However, most of those I've made before are rolls, which I find seemingly more complex but actually technically easier than nigiri sushi. But (un)luckily, what we were tasked to make during our session were the ones I've never tried making before -- nigiri sushi (sashimi over pressed sushi rice), and gunkan maki (battleship sushi; pressed sushi rice wrapped in nori strip with soft toppings).

Since sushi has many varieties, ingredients and preparations, let me just share with you one of the most basic parts of it. The sushi rice. You can make sushi rolls, nigiri, gunkan maki, or even onigiri with this sushi rice recipe.
Ingredients:
Procedure:
Next, here's something a little more challenging than katsu. Unlike its breaded brethren, a katsudon doesn't only involve meat coated in crispy Japanese breading. It also involves fluffy eggs and a sweet and savory sauce that coats not just the meat, but also the rice.

This is one Japanese dish favored not just by many Japanese people, but also by Pinoys. And today, you'll get to learn how to make it, just like how I was taught how to.
Ingredients:
Procedure:
Last among the dishes we were taught how to cook is the Beef Sukiyaki. Although I enjoy this sweet and savory dish, I haven't tried making this yet, not even once. I'm not a fan of sukiyaki that's too sweet, or sukiyaki that's too salty. Fortunately, this sukiyaki recipe has just the right balance of sweet and savory.
Making beef sukiyaki can be a little intimidating, but it's all about finding the right balance of sweet and savory. You can always taste the broth and adjust the ingredients to your liking. Well, that's how I do mine! :)
Ingredients:
Procedure:
I hope you guys will find this post helpful, especially if you love Japanese food as much as I do. Of course, eating at Japanese restaurants will always be a different experience. However, these recipes are also guaranteed to bring authentic, restaurant-style oriental dishes closer to your home.
Cooking Japanese food may seem like a daunting task at first. But with the right knowledge, the right ingredients, and a bottle of Kikkoman soy sauce at hand, I'm sure you're well on your way to impress your family, friends and guests. So don't be afraid to recreate these recipes, or even make your own version of your favorite Japanese (or even non-Japanese) food. It's always fun to play with your food and be the master chef in your own kitchen! ☆⌒(*^∇゜)v
Visit Kikkoman Philipines' Facebook to get more recipes and to know more about Kikkoman's heritage. You can also use the hashtag #CookedWithKikkoman, when you share on Instagram the restaurant dishes you cooked at home using Kikkoman, and get a chance of winning classes at 25 Mushrooms Kitchen!
But of course, there are times when eating out is not always plausible. And for that, I can proudly say that I've even tried my hand at recreating my favorite Japanese dishes, like making my own sushi rolls, katsu, Japanese curry, cold soba, tempura udon, and more.
Just recently, Kikkoman has extended me an invitation to be part of their Oriental Journey: Master Class -- an exclusive cooking class held at 25 Mushrooms Kitchen in Pasig City, sponsored by none other than Kikkoman, which highlighted and took us on a journey to discover the wonders of authentic, restaurant-style oriental dishes. And as a Japanese food lover and amateur-but-passionate home-cook, of course I accepted!
Truth be told, I'm not only interested in learning more about cooking Japanese dishes, but I actually am an enthusiastic fan of the brand. Kikkoman has always been my family's choice of soy sauce, and not only for dipping, as we've cooked countless dishes -- both Japanese and non-Japanese fare, using this very brand's products.
One thing I love about Kikkoman is how its products are naturally-brewed, and with over 300 years of tradition at that. This doesn't only make their line of soy sauces generally healthier, but also makes them more superior in taste, color and aroma. And unlike chemically-processed soy sauces which only add saltiness and color, and more-often-than-not drown out other ingredients' flavors, Kikkoman's enhances food's natural flavors and brings out notes that wouldn't have been there otherwise.
All the attendees in the Oriental Journey: Master Class, including myself, were taught these recipes which we then had to recreate. Some of these dishes, I already got to cook at home for my family (and using Kikkoman products too). But I was glad to learn more cooking hacks from the chefs and instructors at 25 Mushrooms Kitchen. And I'm sure they'll be of help to you too! (*’-^*)b
Sushi Rice
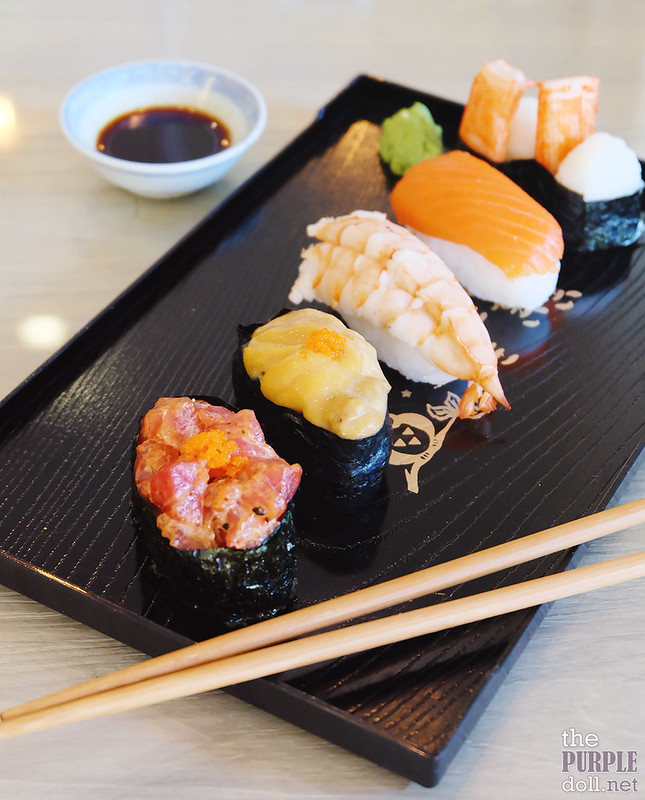
I've always loved sushi, and I've actually made a few for a while now. However, most of those I've made before are rolls, which I find seemingly more complex but actually technically easier than nigiri sushi. But (un)luckily, what we were tasked to make during our session were the ones I've never tried making before -- nigiri sushi (sashimi over pressed sushi rice), and gunkan maki (battleship sushi; pressed sushi rice wrapped in nori strip with soft toppings).
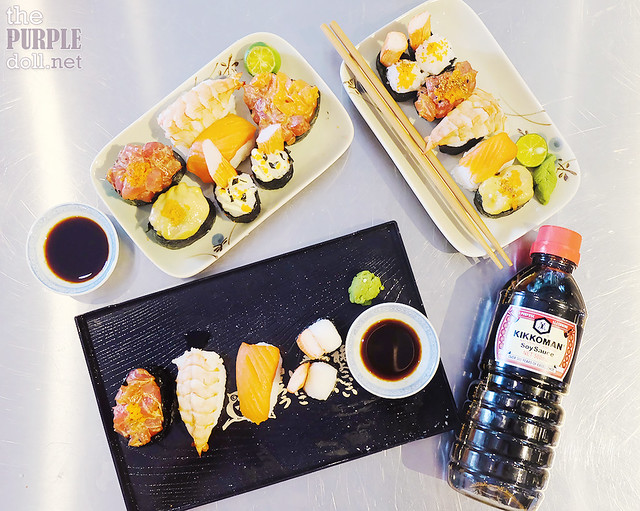
| My self-made sushi platter |
| Spicy tuna gunkan maki, Uni gunkan maki, Ebi nigiri, Salmon nigiri, and Kani nigiri |
Since sushi has many varieties, ingredients and preparations, let me just share with you one of the most basic parts of it. The sushi rice. You can make sushi rolls, nigiri, gunkan maki, or even onigiri with this sushi rice recipe.
Ingredients:
- 1 cup Japanese rice, uncooked
- 1 1/4 cups water
- 1/4 cup rice vinegar
- 1 tbsp. sugar
- 1/2 cup flour
- salt
- sweet vinegar (optional)
Procedure:
- Wash the Japanese rice until the water is clear (about 6 times), and rub the rice with your fingers to remove starch.
- Soak the rice in water for 30 minutes, then cook it in the rice cooker (like ordinary rice).
- Mix the rice vinegar, sugar and pinch of salt in a sauce pan, under low heat until the sugar dissolves. Then, cool the mixture.
- On a non-metallic plate or bowl (best is wooden), spread the hot steamed rice and sprinkle with the vinegar mixture. Fold the rice quickly using a rice spatula. Make sure not to smash the rice.
- Cool and remove the moisture of the rice by fanning it, or placing it near an electric fan. This makes the rice look shiny.
- Use the sushi rice right away. Create your sushi or onigiri, and enjoy!
Pork Katsudon
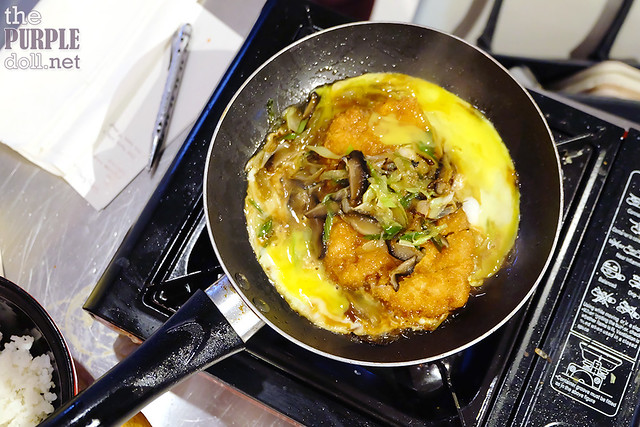
Next, here's something a little more challenging than katsu. Unlike its breaded brethren, a katsudon doesn't only involve meat coated in crispy Japanese breading. It also involves fluffy eggs and a sweet and savory sauce that coats not just the meat, but also the rice.
| My attempt at cooking a Katsudon |
| Doesn't seem so bad, right? |
This is one Japanese dish favored not just by many Japanese people, but also by Pinoys. And today, you'll get to learn how to make it, just like how I was taught how to.
Ingredients:
- 300g (4 pcs.) pork chops, skin removed
- 3 tbsp. all-purpose flour
- 1 pc. egg, beaten
- 1/2 cup Japanese breadcrumbs
- 1 stalk parsley, snipped
- 4 cups hot rice
- 1 pc. small white onion, sliced and sautéed (optional)
- leeks, sliced and sautéed (optional)
- mushrooms, sliced and sautéed (optional)
- 3 1/2 tbsp. sugar
- 1 pc. large white onion, sliced
- 2 tbsp. Sprite
- 3 pcs. eggs, lightly beaten
- 1 cup broth
- 1 cup dashi stock
- 3 tbsp. Kikkoman teriyaki sauce
- 1 1/2 tbsp. mirin
Procedure:
- Pound the pork to slightly flatten, and season with 1/4 tsp. fine salt and 1/4 tsp. pepper.
- Pat each slice of pork in flour, dip in egg, then coat in Japanese breadcrumbs.
- Fry the breaded pork chops until just golden brown on both sides. Set aside and make slits.
- Combine sauce ingredients (except for the eggs), then cover and simmer for 2 minutes.
- Add the fried pork, then spread eggs on top of pork (do not stir). Cover and simmer for 3 minutes.
- Pour the pork and egg mixture over hot rice on a bow. Top with parsley.
- If desired, top with sautéed onions, leeks and mushrooms. Enjoy!
Beef Sukiyaki
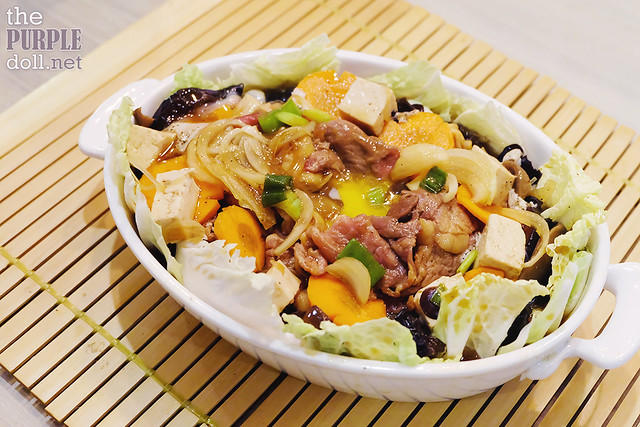
Last among the dishes we were taught how to cook is the Beef Sukiyaki. Although I enjoy this sweet and savory dish, I haven't tried making this yet, not even once. I'm not a fan of sukiyaki that's too sweet, or sukiyaki that's too salty. Fortunately, this sukiyaki recipe has just the right balance of sweet and savory.
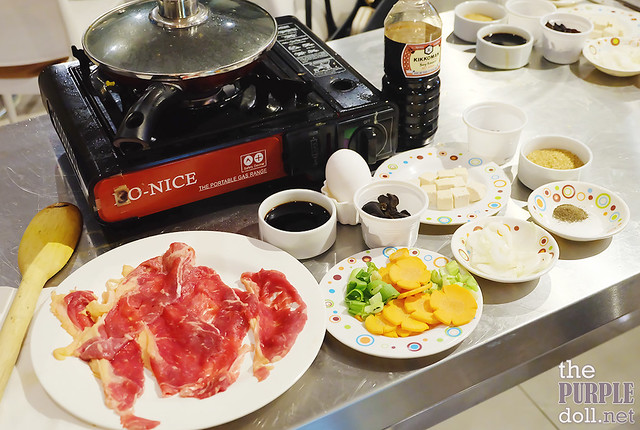
| Prepping to try our hands at making Beef Sukiyaki |
| Not too pretty, but tastes great! |
Making beef sukiyaki can be a little intimidating, but it's all about finding the right balance of sweet and savory. You can always taste the broth and adjust the ingredients to your liking. Well, that's how I do mine! :)
Ingredients:
- 200g beef sirloin, Sukiyaki cut
- 1 pc. medium onion, sliced
- 1 pc small carrot, sliced half moons
- 1 stalk celery, sliced (reserve leaves)
- 3 pcs. (10g) dried shiitake mushrooms, soaked overnight and sliced (reserve 3/4 broth)
- 2-3 pcs. (10g) wood ear/tenga ng daga mushrooms, soaked overnight and sliced
- 3 tbsp. brown sugar
- 2 1/2 cups meat/dashi broth or water
- 100g tofu, cut into 1in. cubes and blanced
- 75g sotanghon, sweet potato noodles or shirataki noodles
- 100g Chinese cabbage, cut into wide strips
- 3 pcs. eggs, whole
- 1 stalk leek, sliced
- Kikkoman soy sauce
- 1/2 cup sake
- 1/2 cup mirin
- 2 tbsp. sugar
- 1/2 cup Kikkoman soy sauce
Procedure:
- Mix beef and 2 tbsp. of Kikkoman soy sauce. Sautée by batch in 2-3 tbsp. of oil until brown. Set aside.
- Season tofu with 1 tbsp. of Kikkoman soy sauce. Set aside.
- In the same pan (where beef was sautéed), sauté onion, carrot, celery and mushrooms. Add the broth, sukiyaki sauce, brown sugar, mushroom broth, 1/4 tsp. pepper and stir.
- Cover and simmer the liquid mixture for 5 minutes. Taste and adjust accordingly.
- Add tofu, noodles and beef. Allow to simmer.
- Add cabbage and egg. Turn off heat, and top with leeks.
- If desired, garnish with celery leaves. Enjoy!
Wrapping it up!
I hope you guys will find this post helpful, especially if you love Japanese food as much as I do. Of course, eating at Japanese restaurants will always be a different experience. However, these recipes are also guaranteed to bring authentic, restaurant-style oriental dishes closer to your home.
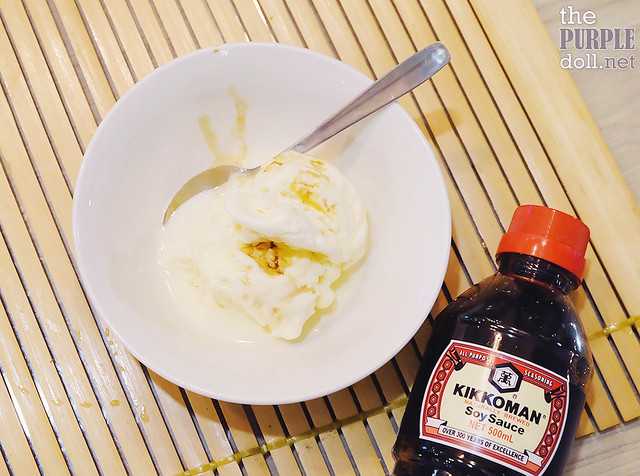
| Kikkoman soy sauce can even be used for desserts! A teaspoon or two can make a simple vanilla ice cream, taste like a salted caramel delight! |
Cooking Japanese food may seem like a daunting task at first. But with the right knowledge, the right ingredients, and a bottle of Kikkoman soy sauce at hand, I'm sure you're well on your way to impress your family, friends and guests. So don't be afraid to recreate these recipes, or even make your own version of your favorite Japanese (or even non-Japanese) food. It's always fun to play with your food and be the master chef in your own kitchen! ☆⌒(*^∇゜)v
Visit Kikkoman Philipines' Facebook to get more recipes and to know more about Kikkoman's heritage. You can also use the hashtag #CookedWithKikkoman, when you share on Instagram the restaurant dishes you cooked at home using Kikkoman, and get a chance of winning classes at 25 Mushrooms Kitchen!


gugh so hungry!! i would like to try the ice cream thing hehe
ReplyDeletenever tried that before
YouTube: Reina Tsukada
Yes, give it a try! :D It's very new to me, and so unique, but it works! <3 Gives the simple vanilla ice cream a little oomph. ;)
DeleteNicee post thanks for sharing
ReplyDelete